Technical information for your tradies
Please ask us if you need something that you can’t find in here
installation guide
Sapphire Spas thanks you for supporting Australian made products and wishes you the best in your spa experience.
Please attach hardcover clips as shown below:
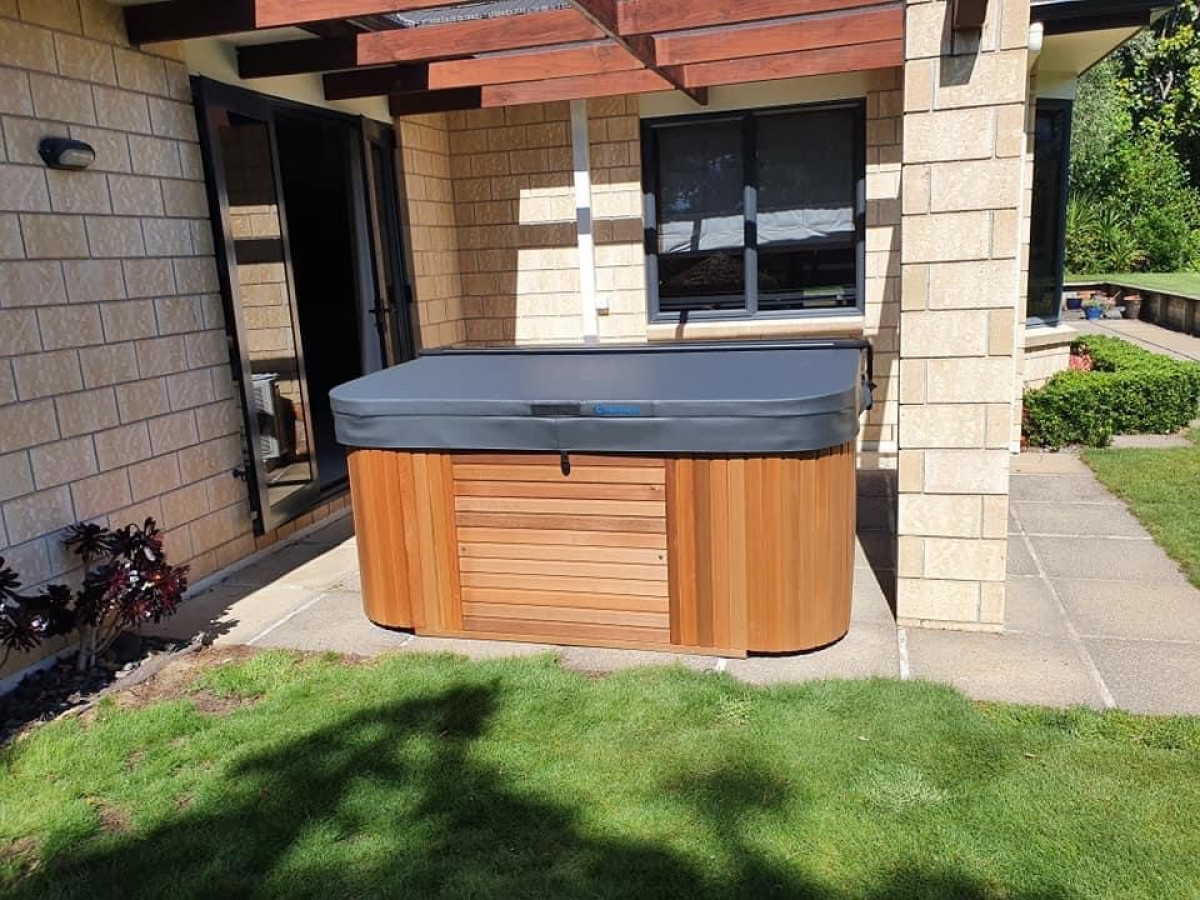
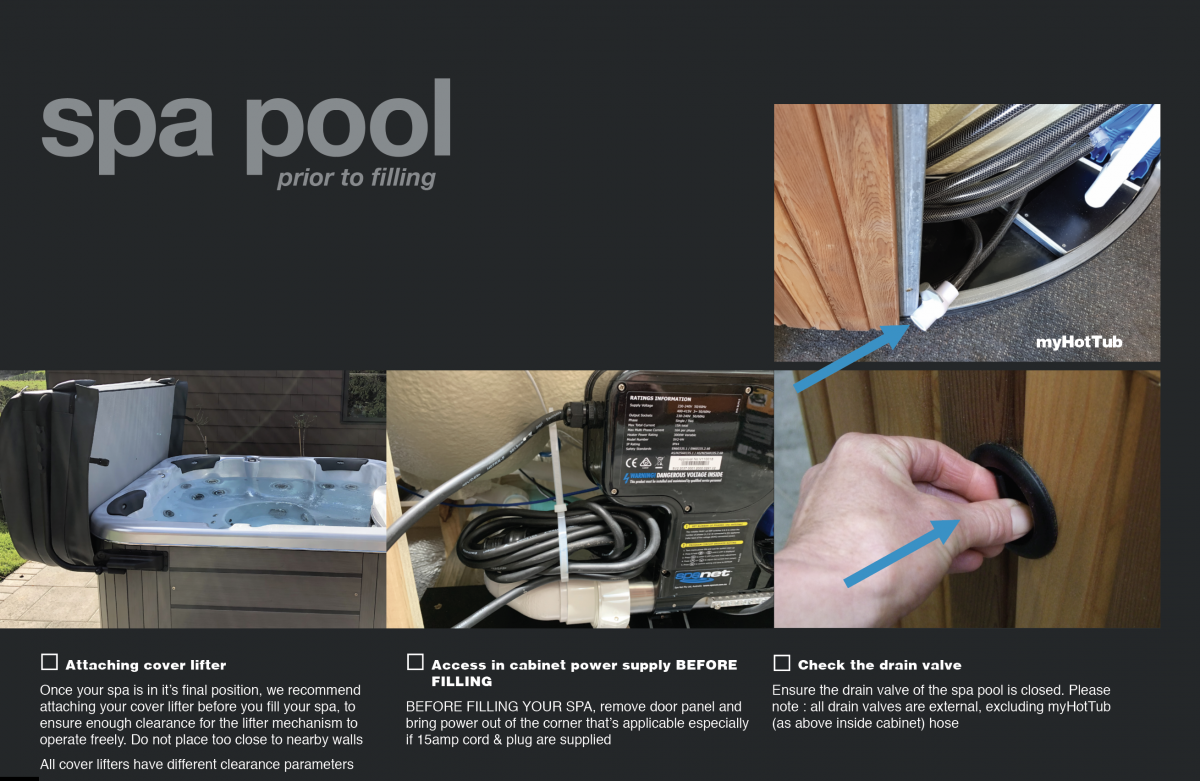
Side view of hardcover clips & lifter installed. Please install hardcover lifter before filling your spa in case you need to move it away from nearby walls etc (blizzard cover shown in below image)
These CAD drawings of our hardcovers, to suit our various spa and swim spa models, will help you to locate and attach your hardcover clips
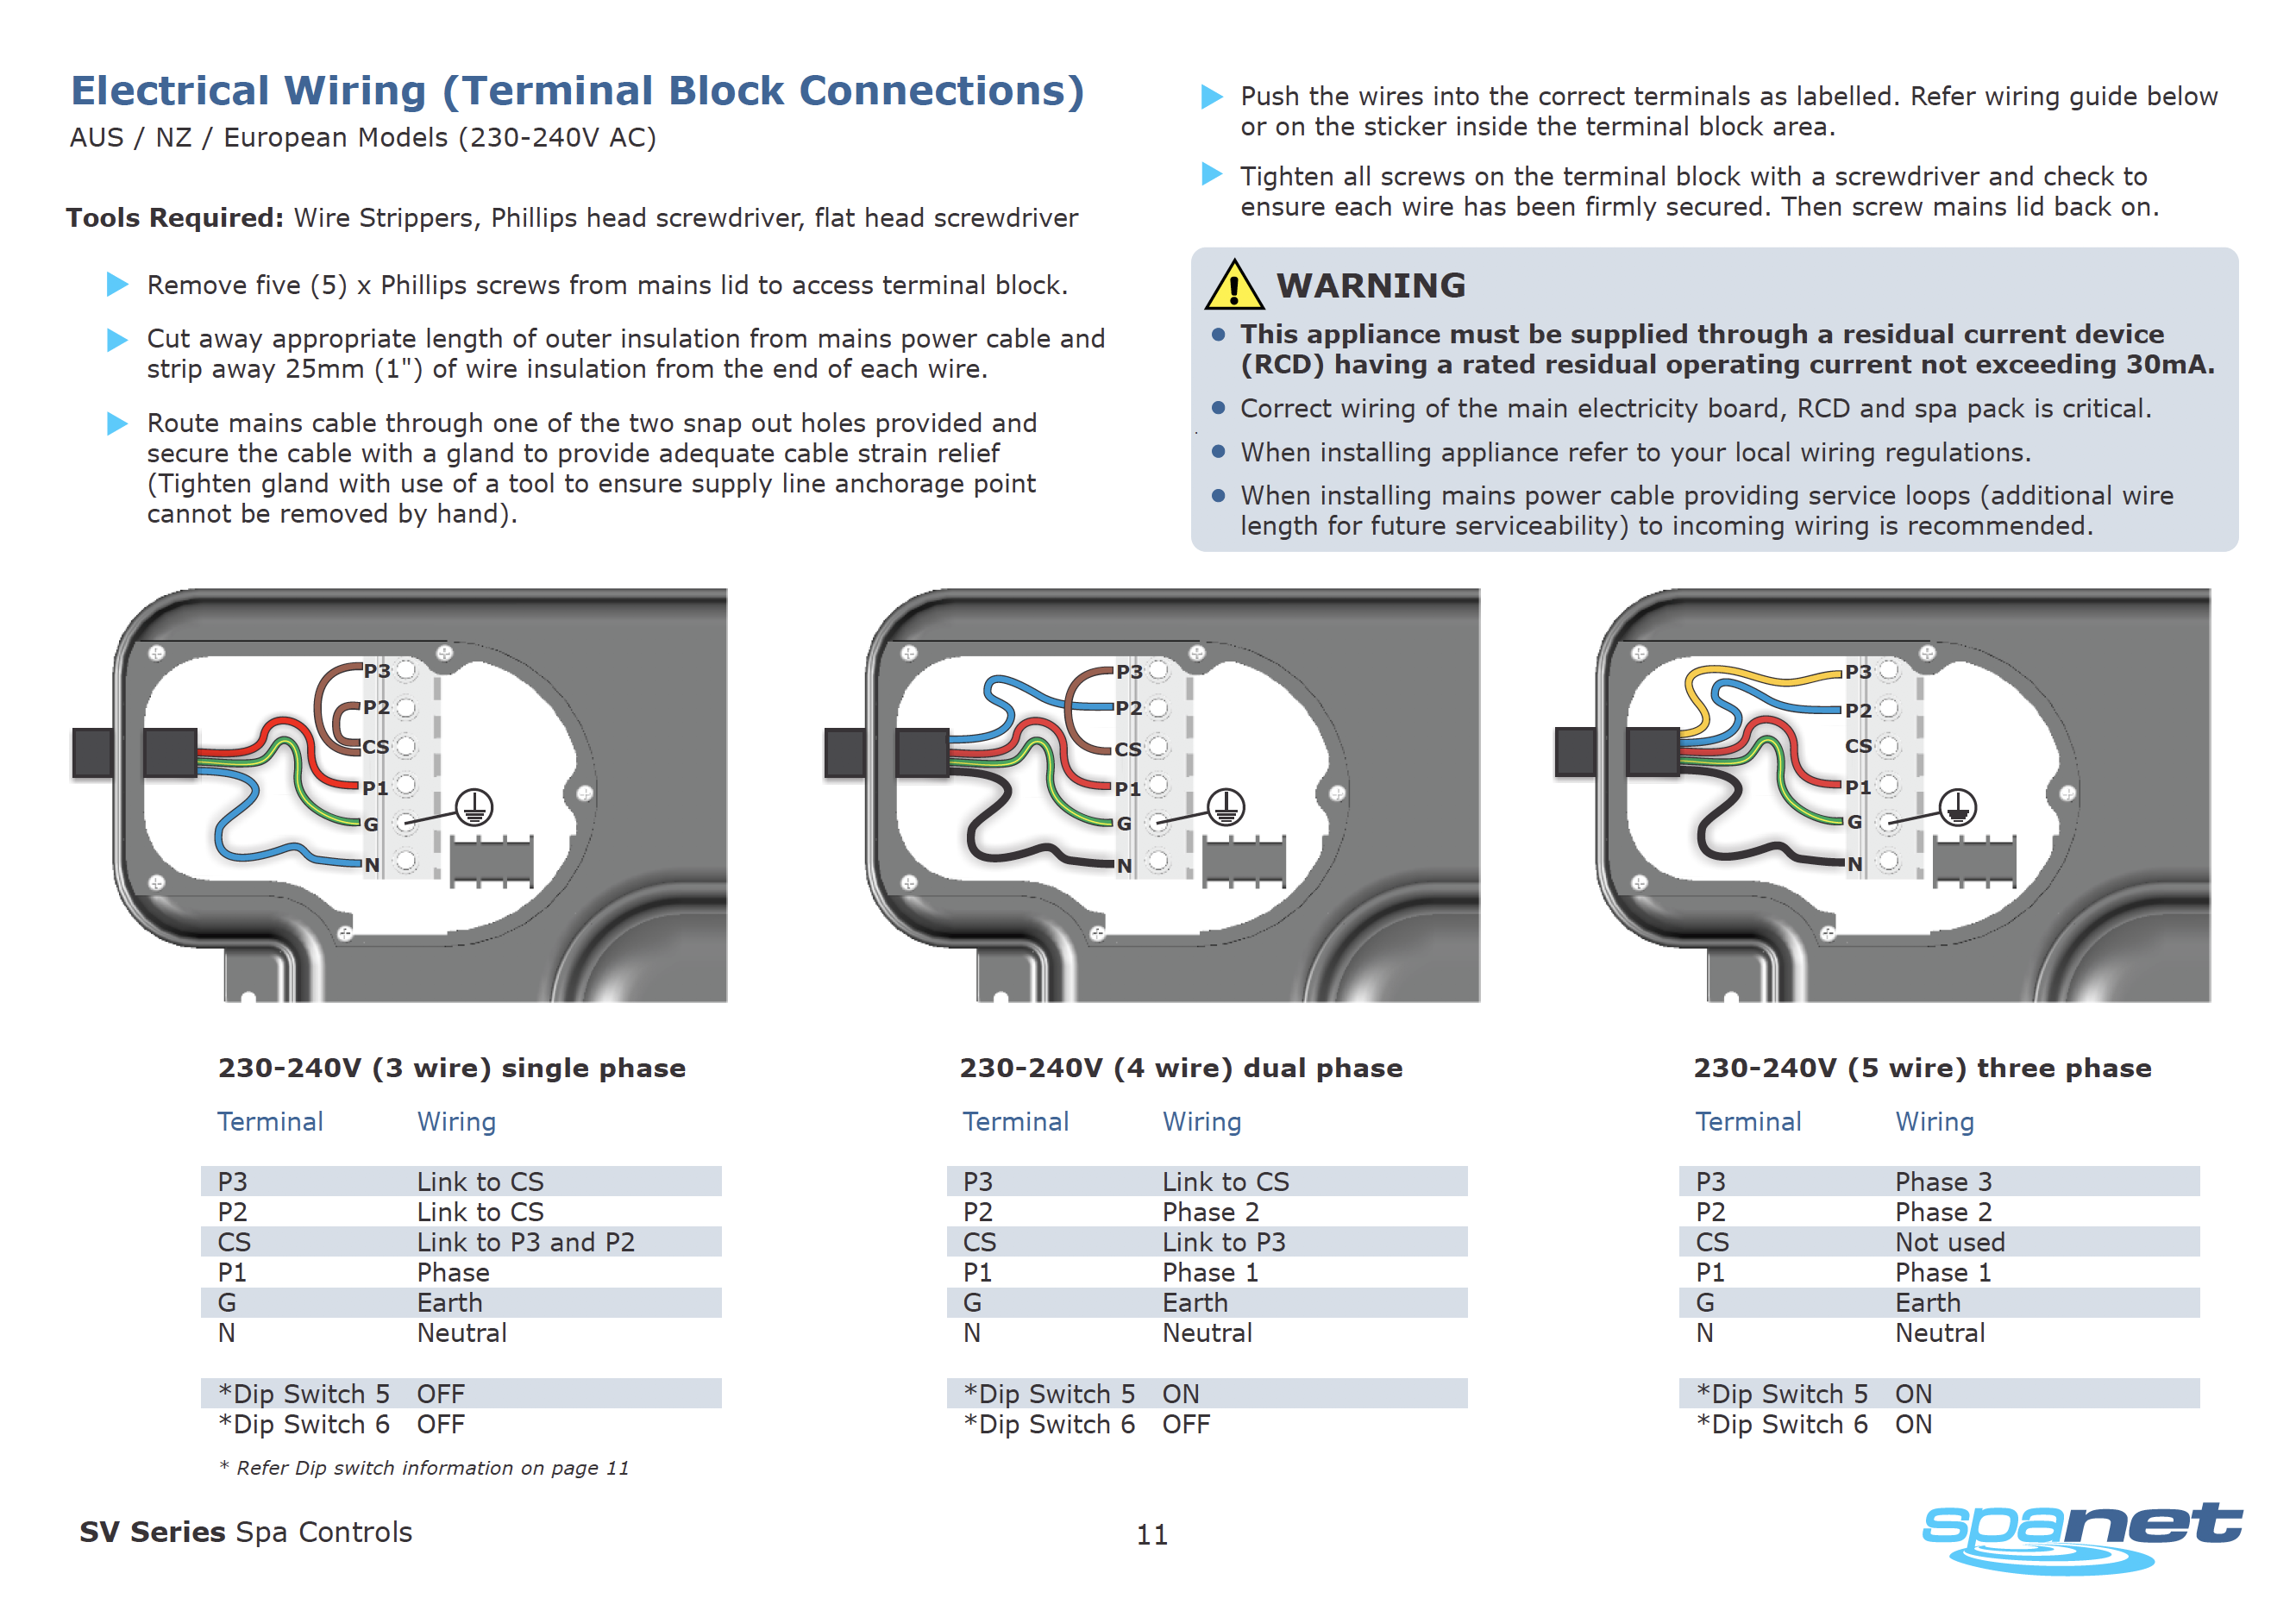
Prior to installation of your spa, your electrician will need to arrange adequate power supply for your spa. You can find details of the power requirements in the 'product specifications' table on the website page for your chosen spa model (search for your spa model using the 'ranges' tab in the top menu bar. Please note, we will always quote only the minimum power requirement.
example: 32amp power is required for the premium model below
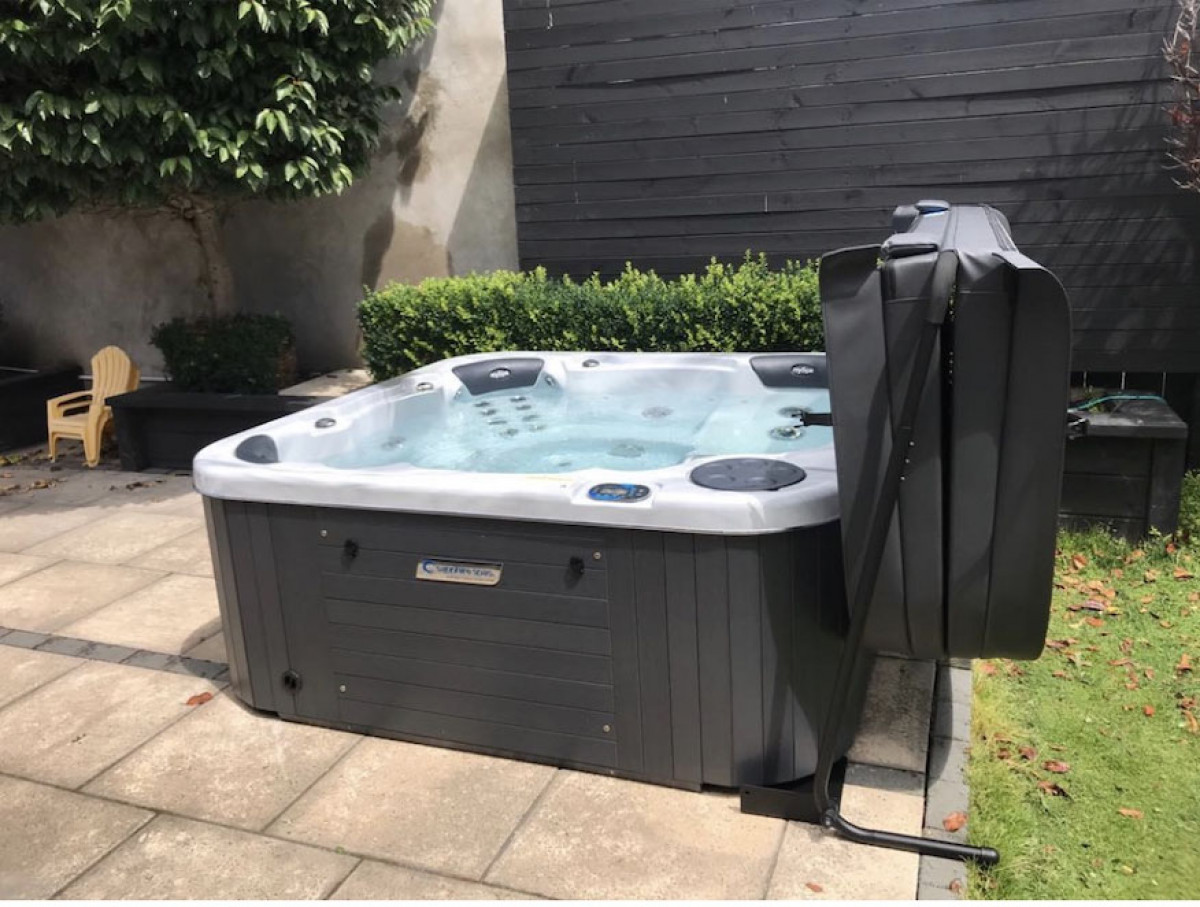
Electrical conduit access to guide your electrician on where to connect power (based on myExtravagance spa pool as a guide only for all spa models)
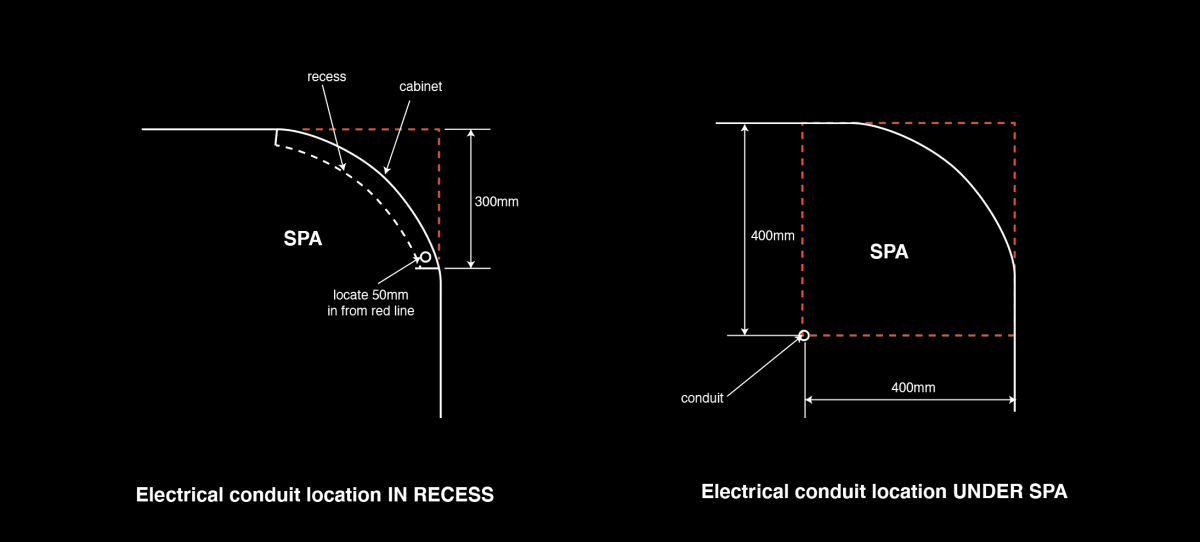


Provide this document to your electrician when they're connecting your spa to the power supply.
If you have purchased an add-on heat&cool pump with your spa, refer to this information for installation & operation
The heat&cool pump will be supplied with a data and power cable already fitted, it simply needs to be connected to the Spanet SV spa control by referring to the SV Series Heat Pump Manual supplied with your spa.
A separate power source for the heat pump is not required.
![]() Spanet SV Series HEAT PUMP Manual (1.2 MB)
Spanet SV Series HEAT PUMP Manual (1.2 MB)
This video takes you through the procedure of fitting a heat&cool pump to your spa pool. You may connect this yourself or your local store can carry out this work at handover.
Please note, the Video is to assist in DIY Installation of a Heat & Cool Pump, so details all procedures required for the Installer. If your Sapphire Spa Retailer has installed your heat pump, please do not change any settings or valve positions without first consulting the Store you purchased from or your Installation Team.
Heat&cool pump installation : stable concrete base / adequate air flow for fan output / close to swim spa for most efficient heating

Once connected, the SV controller will automatically detect the heat pump and enable its operation. Operation and use of the heat&cool pump is covered in a dedicated section of the manual provided